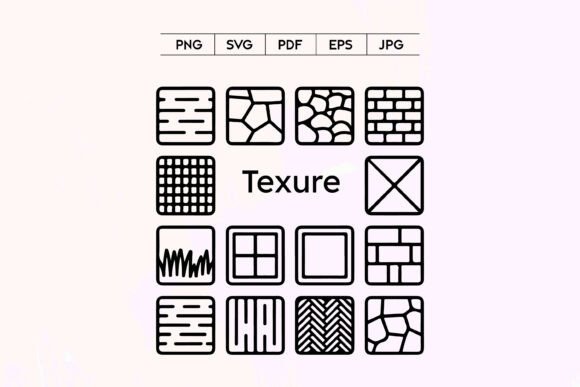
Seamless Texture Icon Set
A Designer’s First Look: Clean, Quiet, and Surprisingly Versatile
When I opened the Seamless Texture Icon Set, my first thought wasn’t “Wow!”—it was “Ah. This will work.” That’s rare. Most icon sets scream for attention or overcomplicate a simple idea. Not this one. These are minimal, geometric outlines—soft curves, balanced negative space, subtle rhythm—built to recede just enough to support, not dominate. Think of them as visual quietude: a whisper of texture rather than a shout. As an embroidery designer who’s stitched everything from monogrammed baby blankets to boutique aprons, I immediately pictured them on a linen tea towel, a neutral-toned sweatshirt cuff, or the corner of a custom embroidered tote bag—never front-and-center, always intentional.
Where It Shines in Real Embroidery Projects
The Seamless Texture Icon Set isn’t built for bold logos or dense fill-stitch statements. It thrives where subtlety adds sophistication: a single line-icon along the hem of a nursery onesie, a repeating motif stitched in tonal thread across a kitchen towel’s border, or a delicate repeat pattern on the back pocket of a handmade denim apron. I recently used a scaled-down version of one of the tile motifs as a background filler behind a satin-stitched monogram on a cotton-linen pillow cover—and it gave the piece depth without competing. For Etsy sellers and small shop owners, that kind of restrained elegance translates directly into perceived value: customers notice the care, even if they can’t name why.
It also works beautifully for holiday embroidery and personalized gifts when you want warmth without clutter—think a tiny abstract leaf icon repeated along the seam of a wool-blend blanket, or a minimalist wave motif stitched in soft grey thread on a baby swaddle. Because the icons are outline-based and low-detail, they translate cleanly to smaller hoop sizes (think 4x4 or 5x5) without losing legibility—ideal for caps, patches, and baby embroidery where space is tight and stitch count must stay lean.
Where to Pause—and Test First
That same simplicity becomes a consideration on textured or stretchy fabrics. On terry cloth towels or thick fleece, fine outlines can disappear into the pile unless you adjust stitch length or add a light underlay. And on thin or loosely woven fabric—like rayon challis or lightweight chambray—you’ll want extra stabilizer; those clean lines need structure to hold their shape during stitching and washing. I always test the Seamless Texture Icon Set on scrap fabric first, especially when planning commercial embroidery or craft fair merchandise. A quick run on black and white mockups helps me gauge contrast before committing thread colors—critical when selling finished products where color accuracy builds customer trust.
Dark fabric? No problem—but choose thread with enough sheen or weight to carry the line. Metallic or matte cotton works better than flat polyester here. Curved surfaces like caps or curved pillow edges require careful placement: avoid sharp corners or abrupt directional shifts in the icon layout, since running stitch paths can distort. And while these icons aren’t meant for tiny lettering or intricate corners, they *do* hold up well as decorative accents—say, framing a small embroidered patch or anchoring a corner on a printable mockup for your digital product listings.
What It Adds to Your Handmade Product—and Your Brand
This set doesn’t shout “handmade”—it *feels* handmade. There’s a human rhythm in the spacing, a gentle asymmetry in some of the repeats that avoids sterile perfection. That matters. When you’re selling on Etsy or at local craft fairs, buyers respond to authenticity—not just craftsmanship, but intention. Using the Seamless Texture Icon Set thoughtfully tells your audience you understand balance: between detail and restraint, modernity and warmth, digital precision and tactile charm.
For apparel decorators and small business owners building boutique branding, it’s a quiet asset. You can use one icon consistently across packaging tags, social media banners, and product labels—creating cohesion without repetition fatigue. And because it’s delivered in SVG, EPS, PNG, JPG, and PDF, it scales cleanly for both embroidery files and printable mockups, making it easy to show clients or shoppers exactly how a design will land on a finished product.
Practical Notes Every Embroidery Designer Should Keep Handy
- Always test on your actual fabric and stabilizer combo—especially for baby embroidery or items that will be washed frequently.
- Check stitch density in your embroidery software. Low-density outlines stitch faster and wear better on lightweight garments.
- Confirm hoop size compatibility before digitizing—some icons scale beautifully down to 2.5”, others need breathing room.
- Inspect small details in your software preview: do any line ends taper too sharply? Will they fray or pull during stitching?
- Compare thread color contrast on both light and dark fabric backgrounds—tonal stitching can vanish on certain weaves.
- Use proper stabilizer: cutaway for stretchy knits, tear-away for stable wovens, and medium-weight for most home décor projects.
- Verify licensing before selling finished items or bundling the Seamless Texture Icon Set into digital embroidery files—it’s listed as Graphics, so check usage rights for commercial embroidery and resale.
The Seamless Texture Icon Set won’t replace your go-to floral motif or bold script font—but it fills a gap many designers overlook: the quiet, confident detail that makes a handmade product feel considered, complete, and quietly special. Whether you’re stitching a holiday gift for a friend or building a cohesive line for your craft business, it’s the kind of design asset that earns repeat use—not because it’s flashy, but because it simply *works*.